


Resized to 42% of original (view original)


Artist's commentary
【Making】第23回博麗神社例大祭カタログ表紙イラスト
第23回博麗神社例大祭カタログ表紙イラストの過程解説です。
タイムラプス
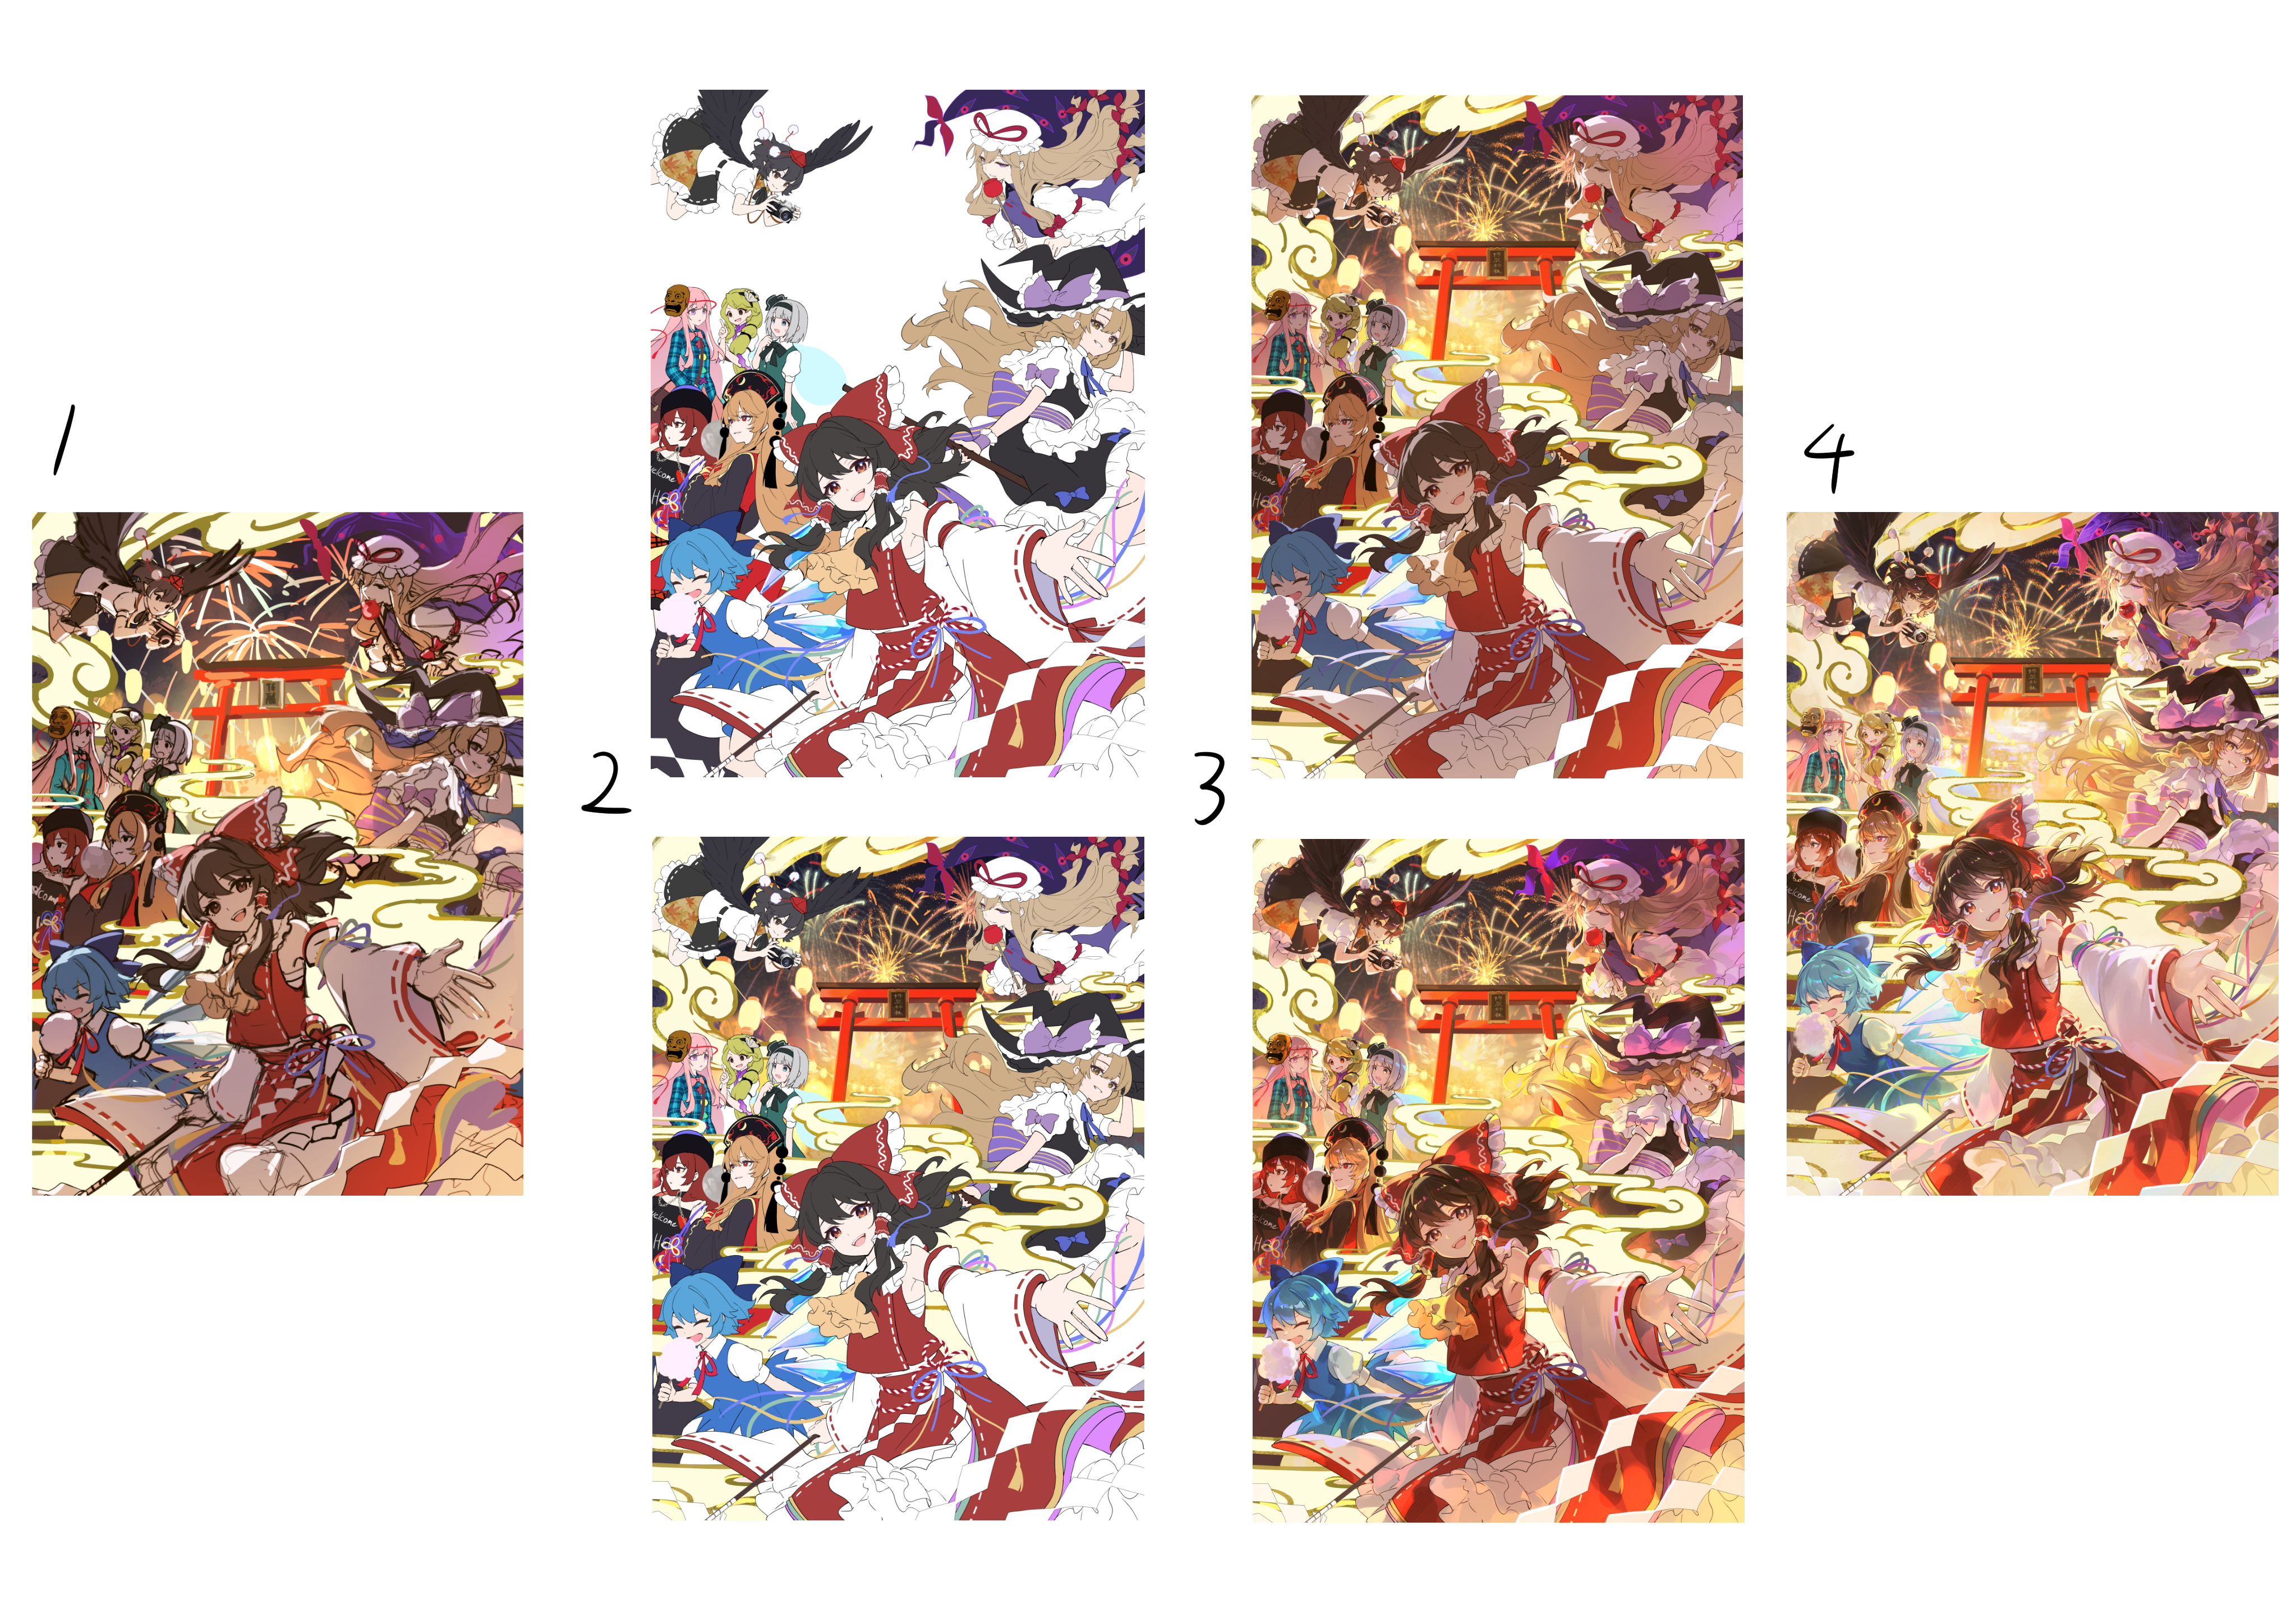
過程画像(全体)
過程画像(陰影)
制作に使用しているブラシは以下で配布・紹介しています。
https://downloads.fanbox.cc/images/post/11730785/gnmf9fRQ9s2GOnQmEeb56v9v.png
1,ラフ sketch
https://downloads.fanbox.cc/images/post/11730785/zyklLs6AZbsKgsKE2tRVB8Jm.png
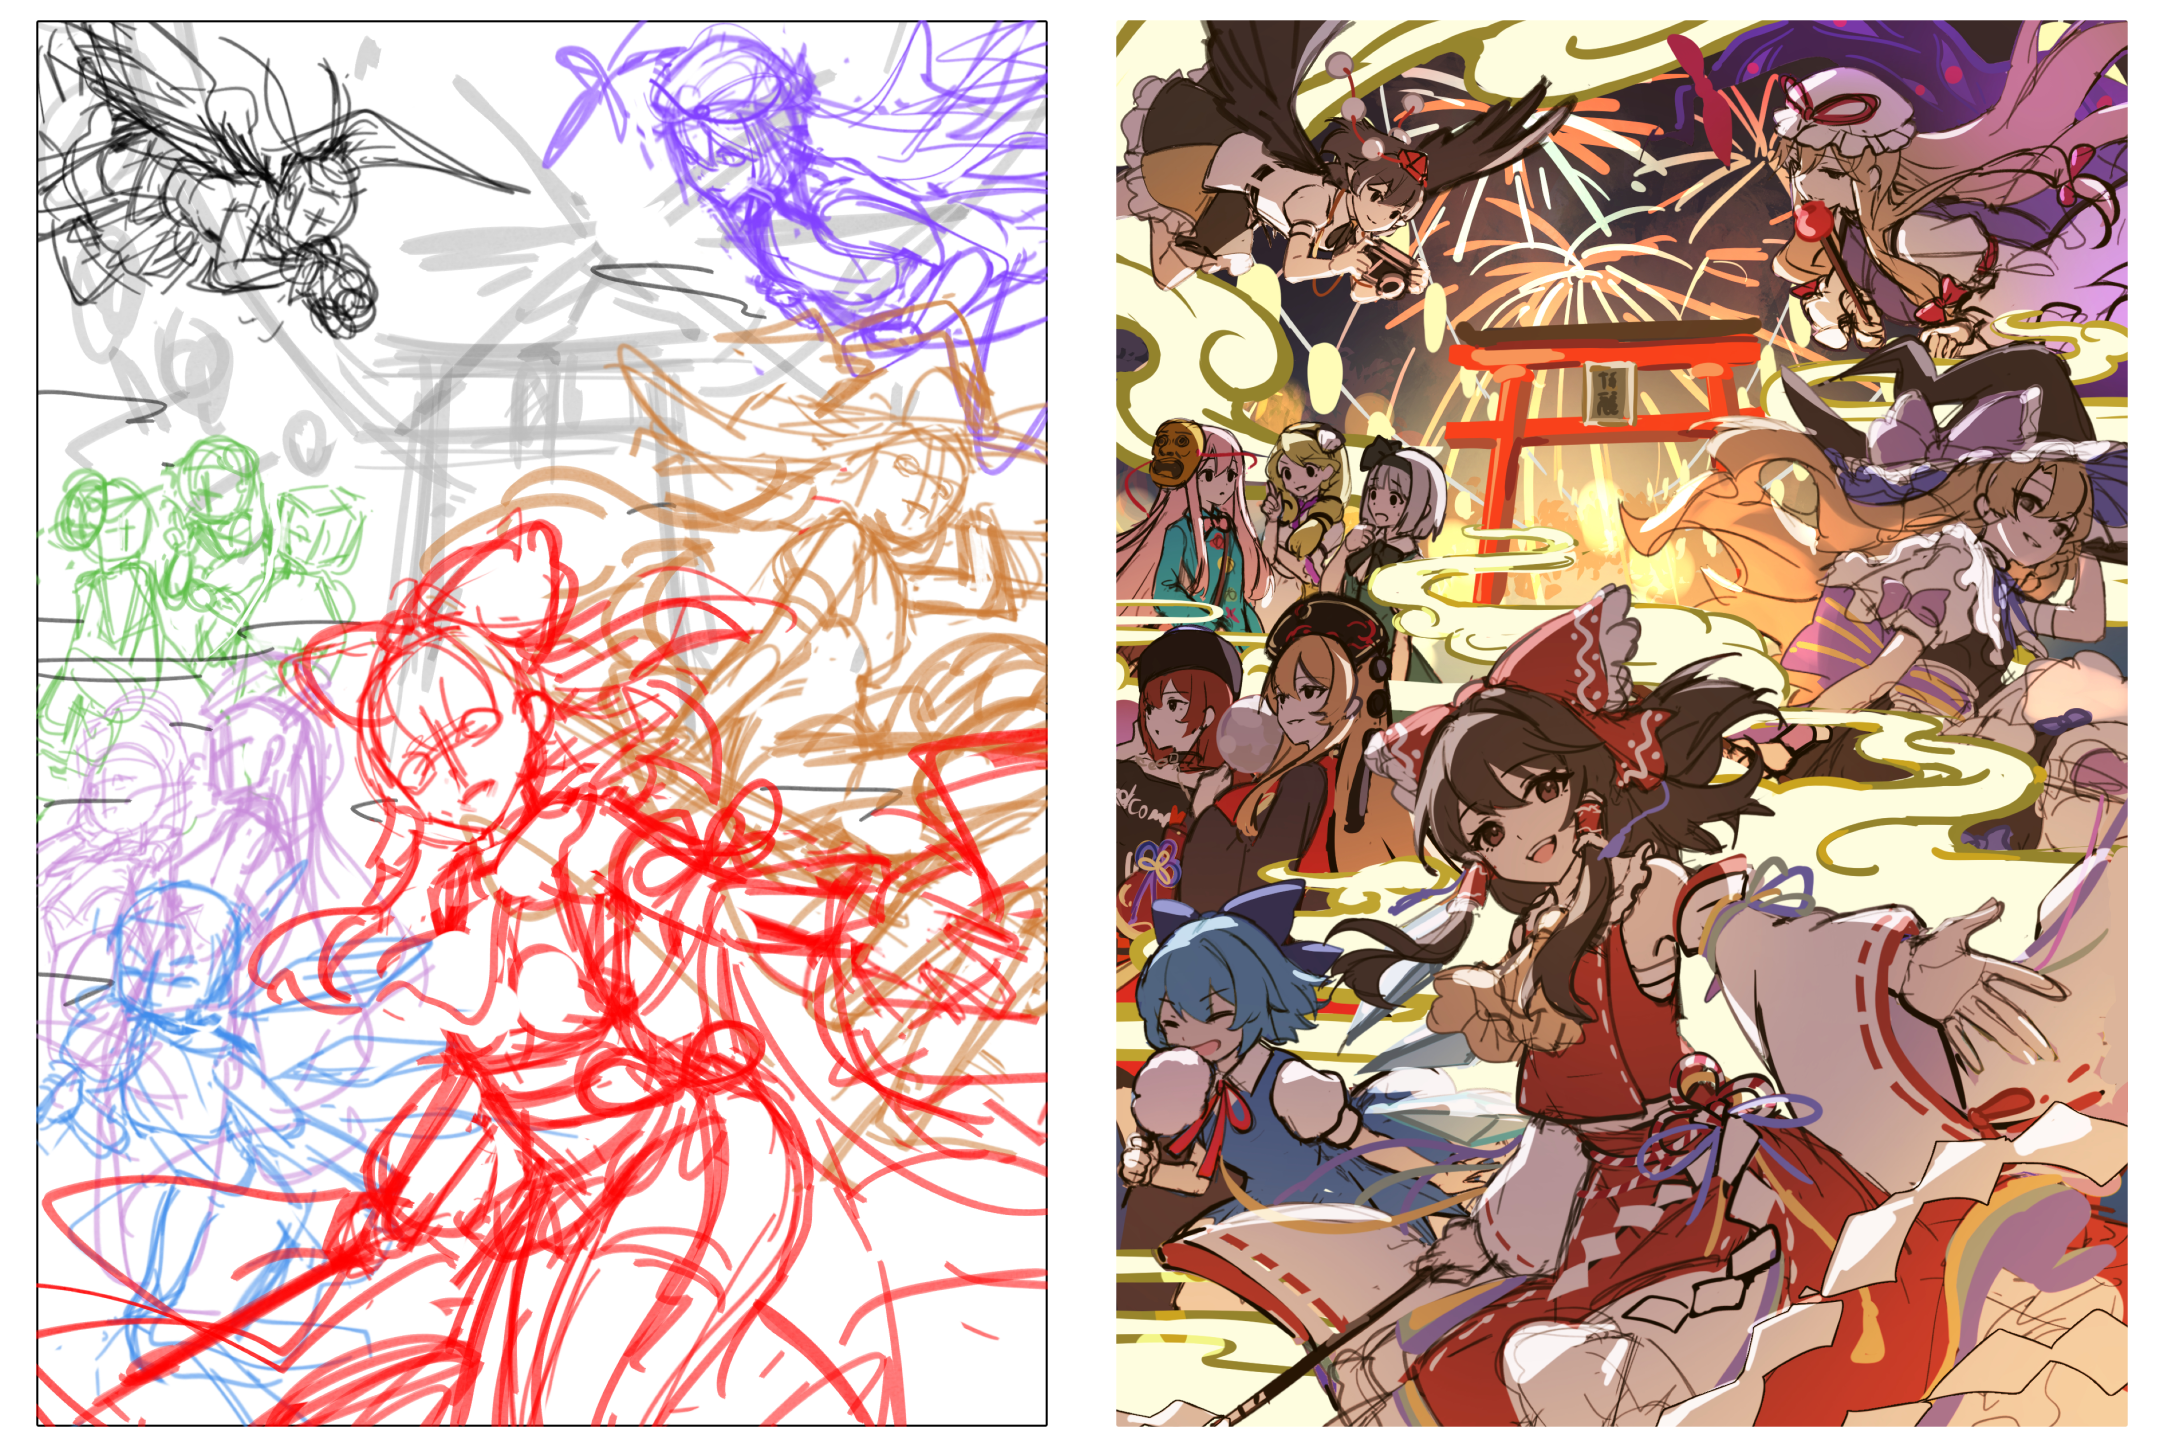
霊夢がメインになるよう、衣装に装飾アレンジを加えつつ大きく配置しました。
他キャラは自由に選択可能だったので、自分の好みを詰め込みました。
魔理沙は霊夢とセットで必ず入れたいと思い、2番目に大きく配置しています。
後々の文字入れを考慮し、画面上部には余白を確保しています。
背景はお祭りの博麗神社をイメージし、花火で賑やかさを出しました。
華やかさを出すため、赤や黄色などの暖色系を強調しています。
I placed Reimu as the main focus by making her larger and adding decorative adjustments to her outfit.
Since the other characters were free to choose, I included my personal favorites.
I definitely wanted Marisa together with Reimu, so I made her the second-largest.
I also left space at the top for text to be added later.
For the background, I imagined Hakurei Shrine during a festival, and used fireworks to create a lively atmosphere.
To make it feel more festive, I emphasized warm colors like red and yellow.
2,線画・下塗り line drawing and base color
https://downloads.fanbox.cc/images/post/11730785/Yz0wso0MH8vvdIK0LmXTiQMc.jpeg
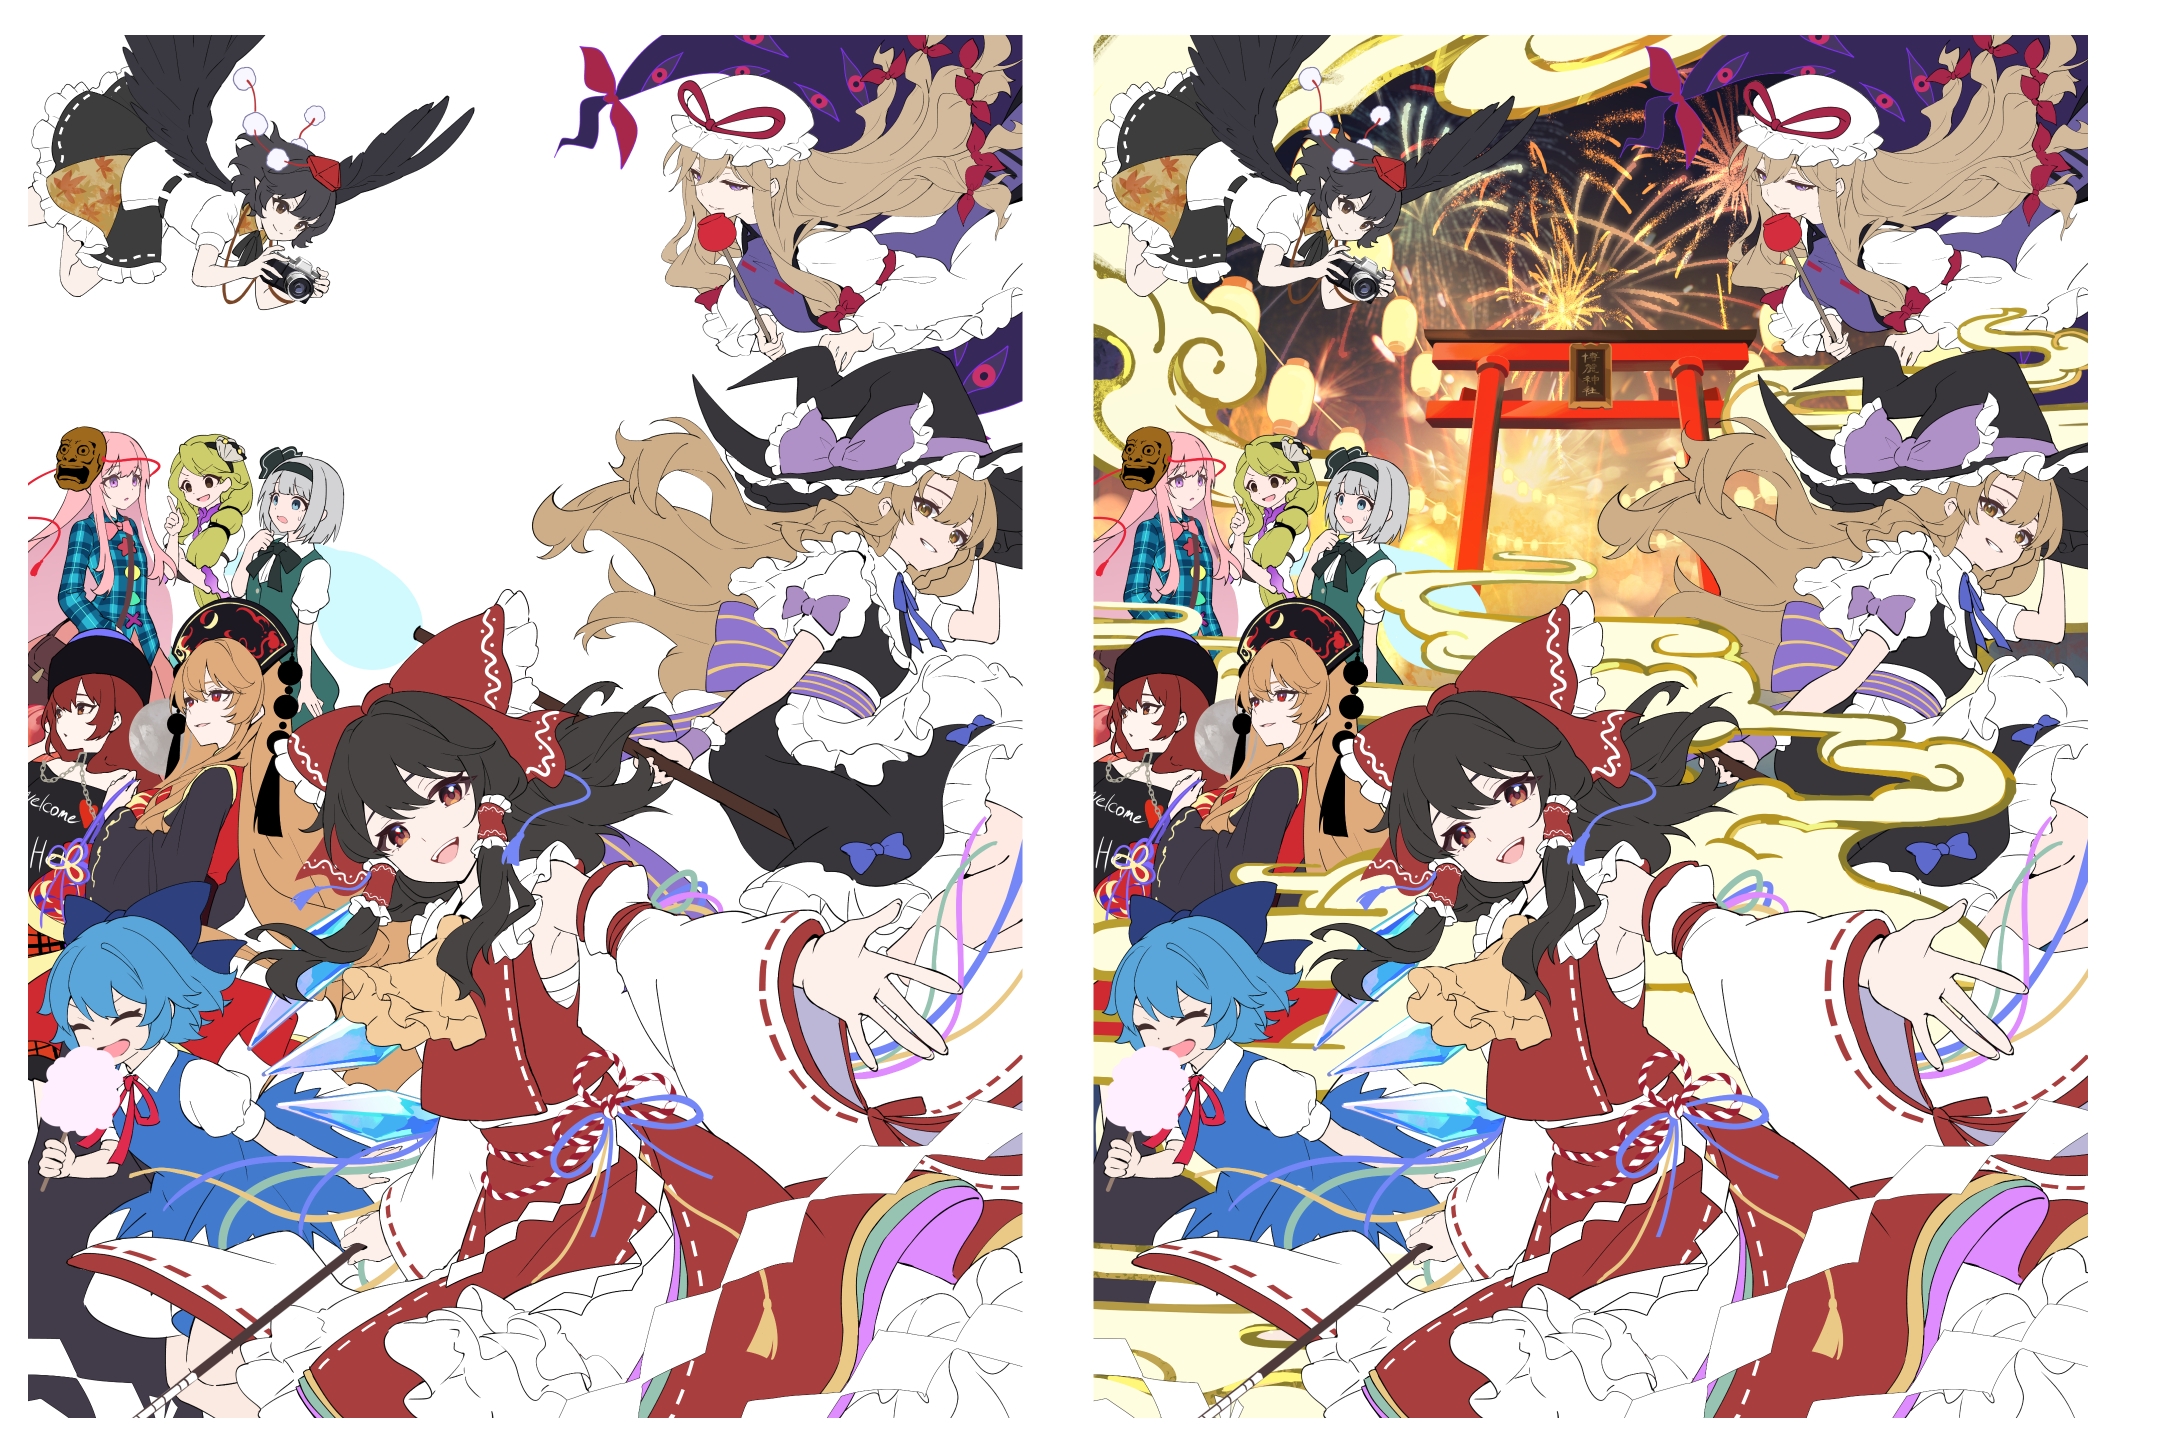
線画のコツについてはこちらの記事をご参照ください。
線画のコツについてはこちらの記事をご参照ください。
Please refer to this article for tips on line drawing.
https://downloads.fanbox.cc/images/post/11730785/9d7aaGjr5DsUvpfhGmIfeF2f.jpeg
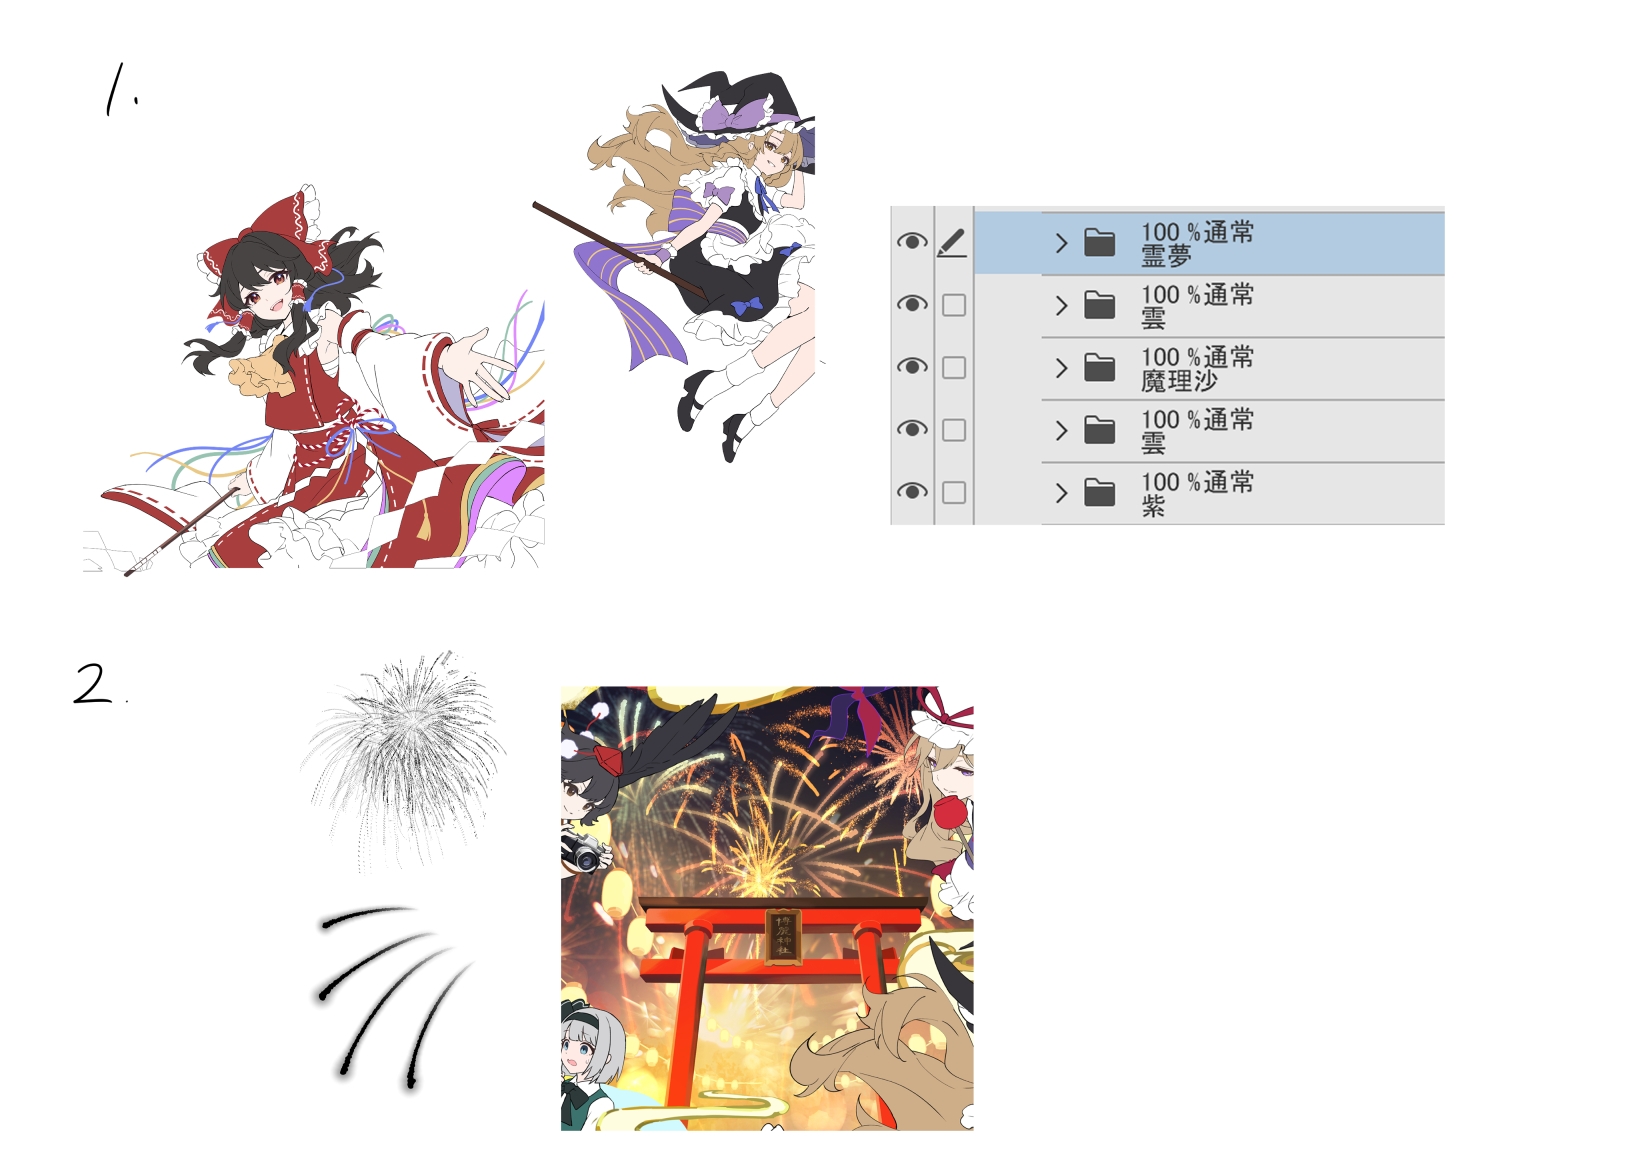
これ以降の作業はカラーラフをベースに進めていきます。
1,後々調整しやすいよう、キャラは1人ずつレイヤーを分け、雲などで隠れる部分も描いています。
2,背景には下記の花火素材を使用しました。
スタンプとブラシでの手描きを併用しています。
From here on, I continued the work based on the color sketch.
1, To make later adjustments easier, I separated each character onto their own layer, and I also painted the parts that would be hidden by clouds and other elements.
2, For the background, I used the fireworks assets below.
I used both stamps and hand-drawn brushwork.
3,着彩 coloring
step1:
https://downloads.fanbox.cc/images/post/11730785/3Sc24JRZUot2AeNfNpMBwAbc.jpeg
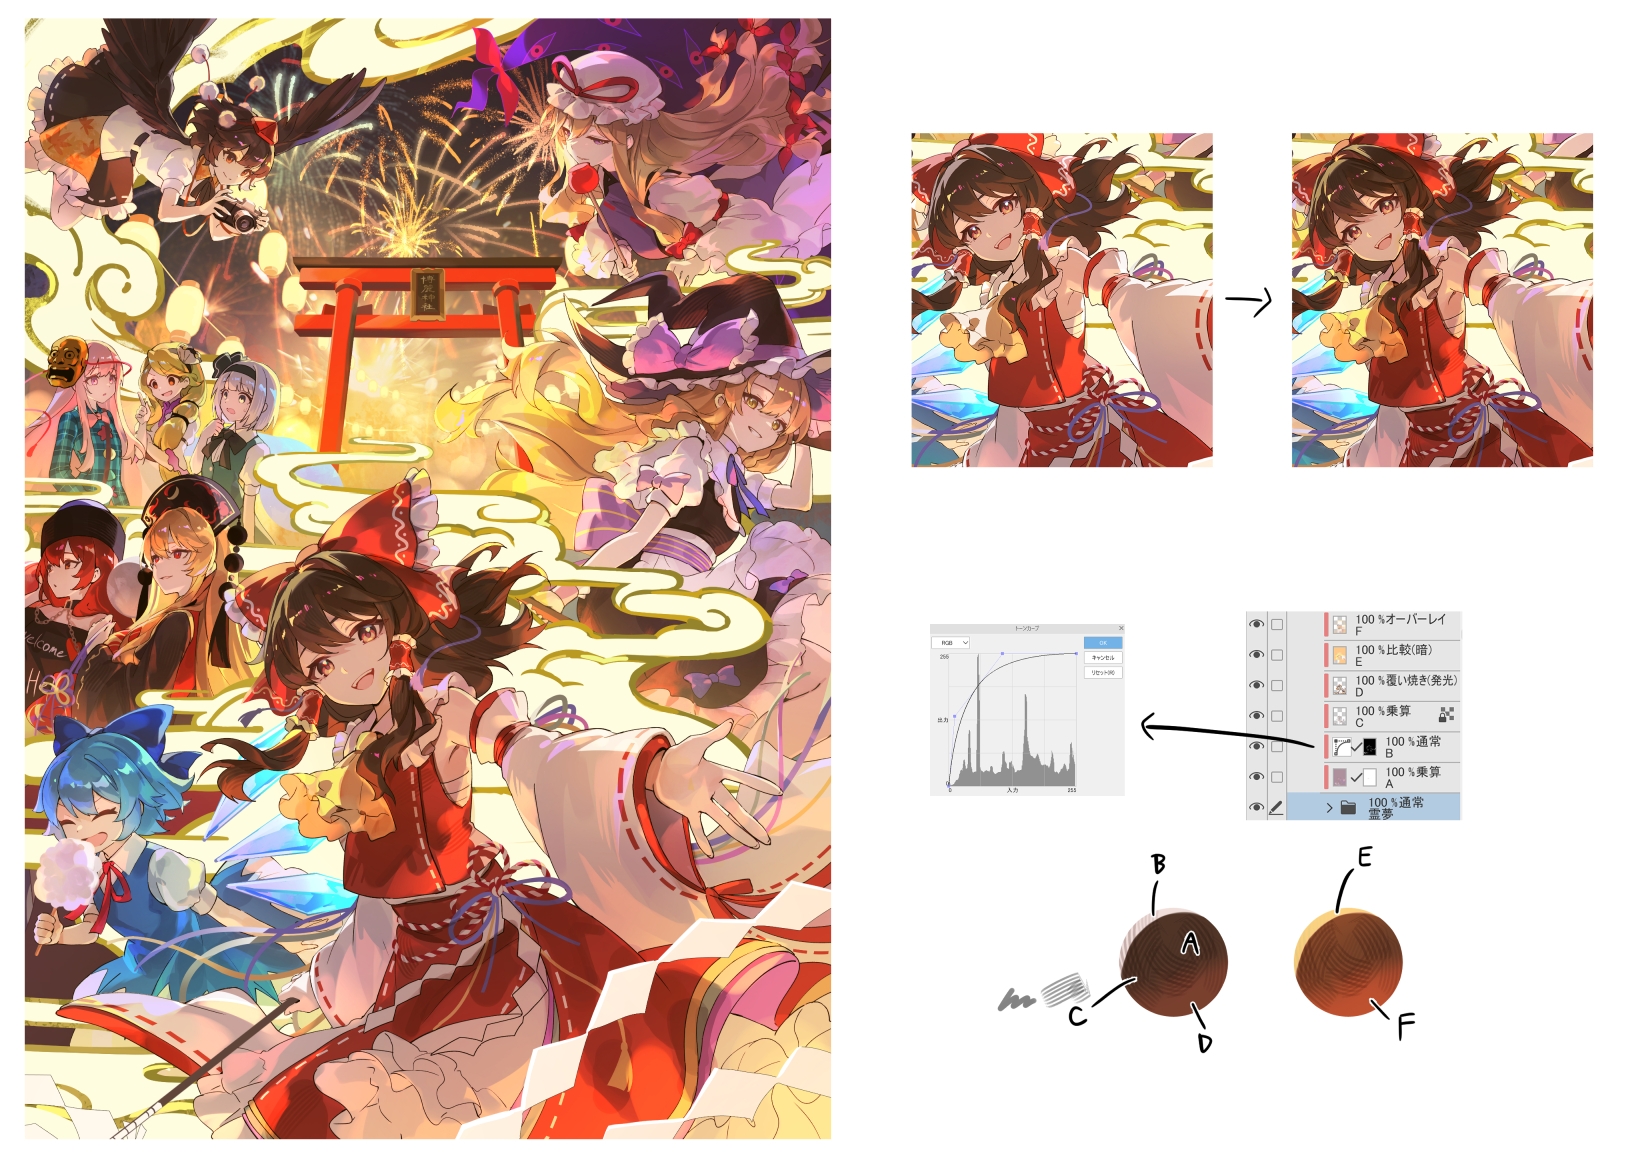
カラーラフで作った陰影カラーを再利用しつつ整えていきます。
A:全体の陰影(乗算)
B:明部(トーンカーブ)
C:服のシワなどの質感描写(乗算)
D:反射光(覆い焼き発光)
E:明部の色を環境光に合わせるためのフィルター(比較暗)
F:全体のコントラストや彩度調整用(オーバーレイ)
全キャラ同じ構成で陰影を付けています。
最初は明部と反射光をざっくり描き、ある程度まとまったらCの細部描写を追加します。
反射光はスクリーンを使用することが多いのですが、今回のようにくっきりと明るい色にしたい場合は覆い焼き発光の方が使いやすいです。
I refined the shading while reusing the shadow colors from the color sketch.
A: Overall shadows (Multiply)
B: Highlights (Tone Curve)
C: Texture details such as clothing folds (Multiply)
D: Reflected light (Glow Dodge)
E: A filter to match highlight colors to the ambient light (Darken)
F: For overall contrast and saturation adjustments (Overlay)
I used the same layer setup for shading on all characters.
At first, I roughly paint the highlights and reflected light, and once it’s mostly in place, I add the detailed work in C.
I often use Screen for reflected light, but when I want a crisp, bright color like this, Glow Dodge is easier to use.
上記の記事では陰影付けについて詳しい解説をしていますので、こちらもぜひご参考ください。
The article above provides a detailed explanation of the shading techniques, so please take a look at it for reference.
step2:
https://downloads.fanbox.cc/images/post/11730785/CUjbjS7BSCFbCaPo5y9bzMoC.jpeg
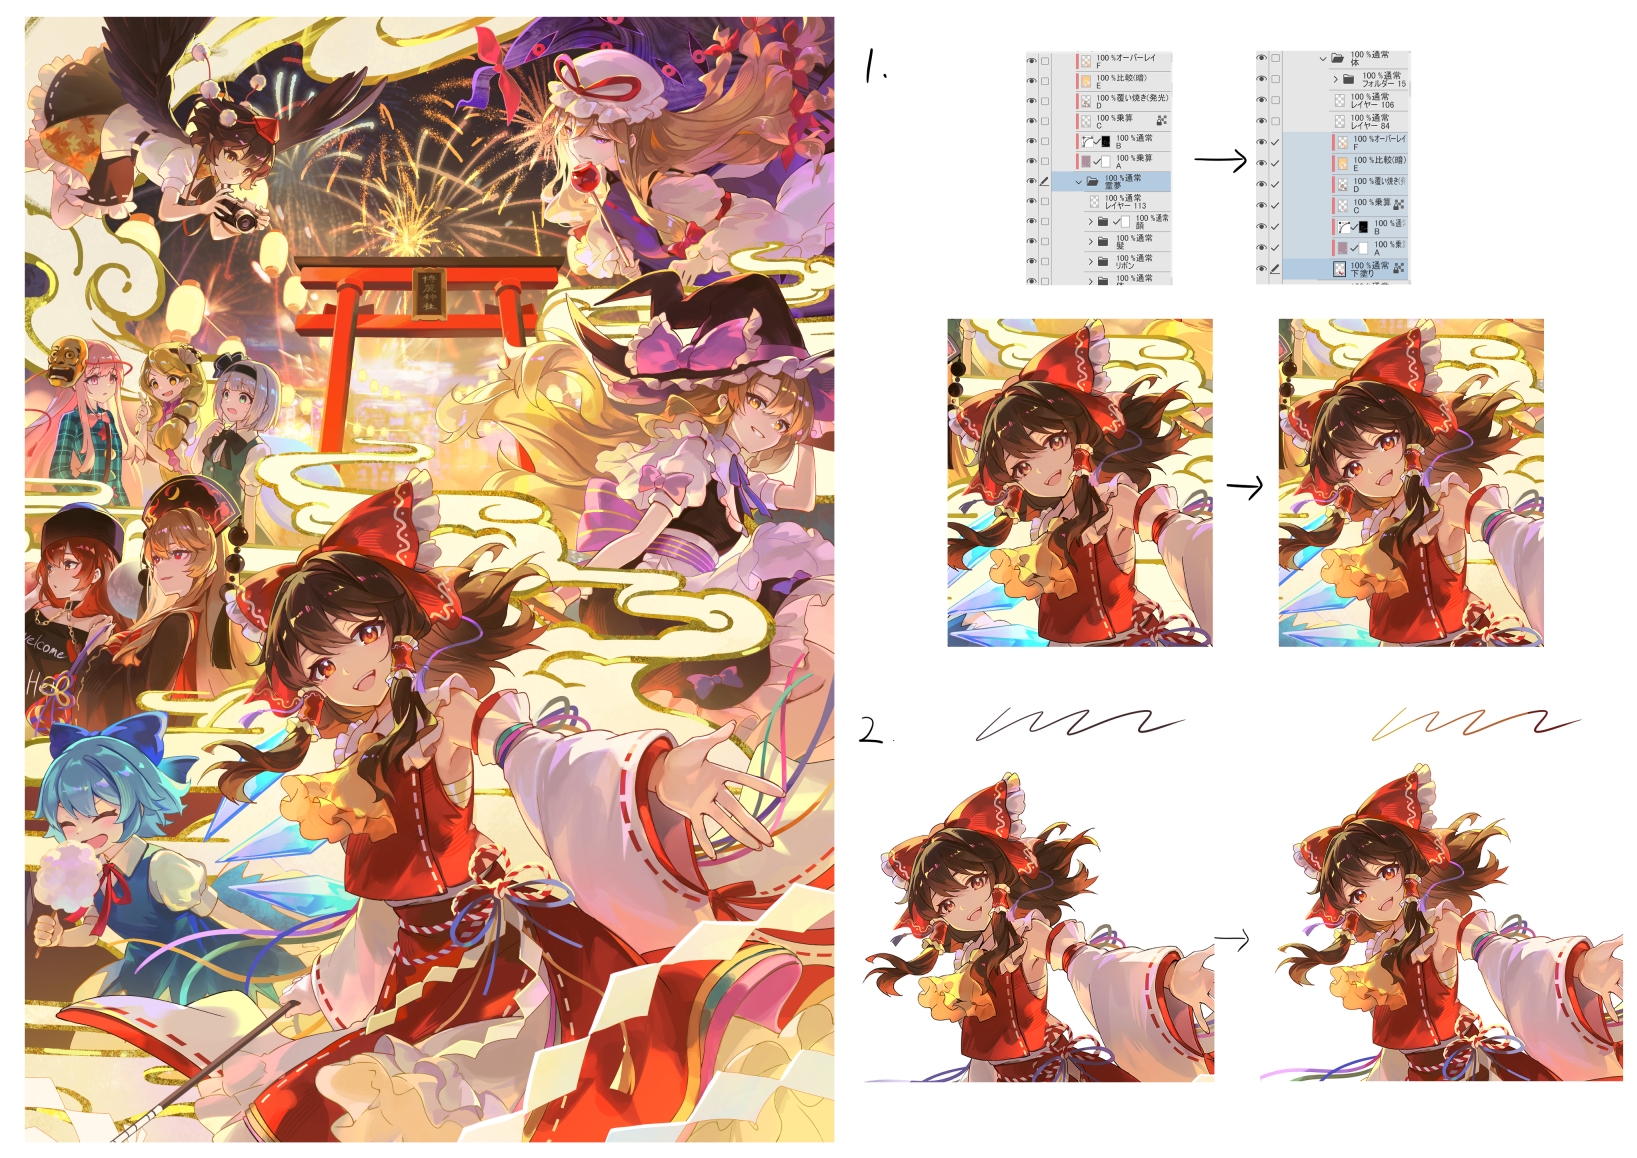
1,step1で作成した陰影レイヤーを下塗りレイヤーにコピー&ペーストして結合後、細部を整えます。
2,線画の色を黒から暖色系に変えて、全体の色合いに馴染むようにします。
1, I copied and pasted the shading layer made in step 1 onto the base color layer, merged them, and then refined the details.
2, I changed the lineart color from black to warm tones so it blends into the overall colors.
step3:
https://downloads.fanbox.cc/images/post/11730785/N5eCHbYxIgimlq3Ha2E9LLNH.jpeg
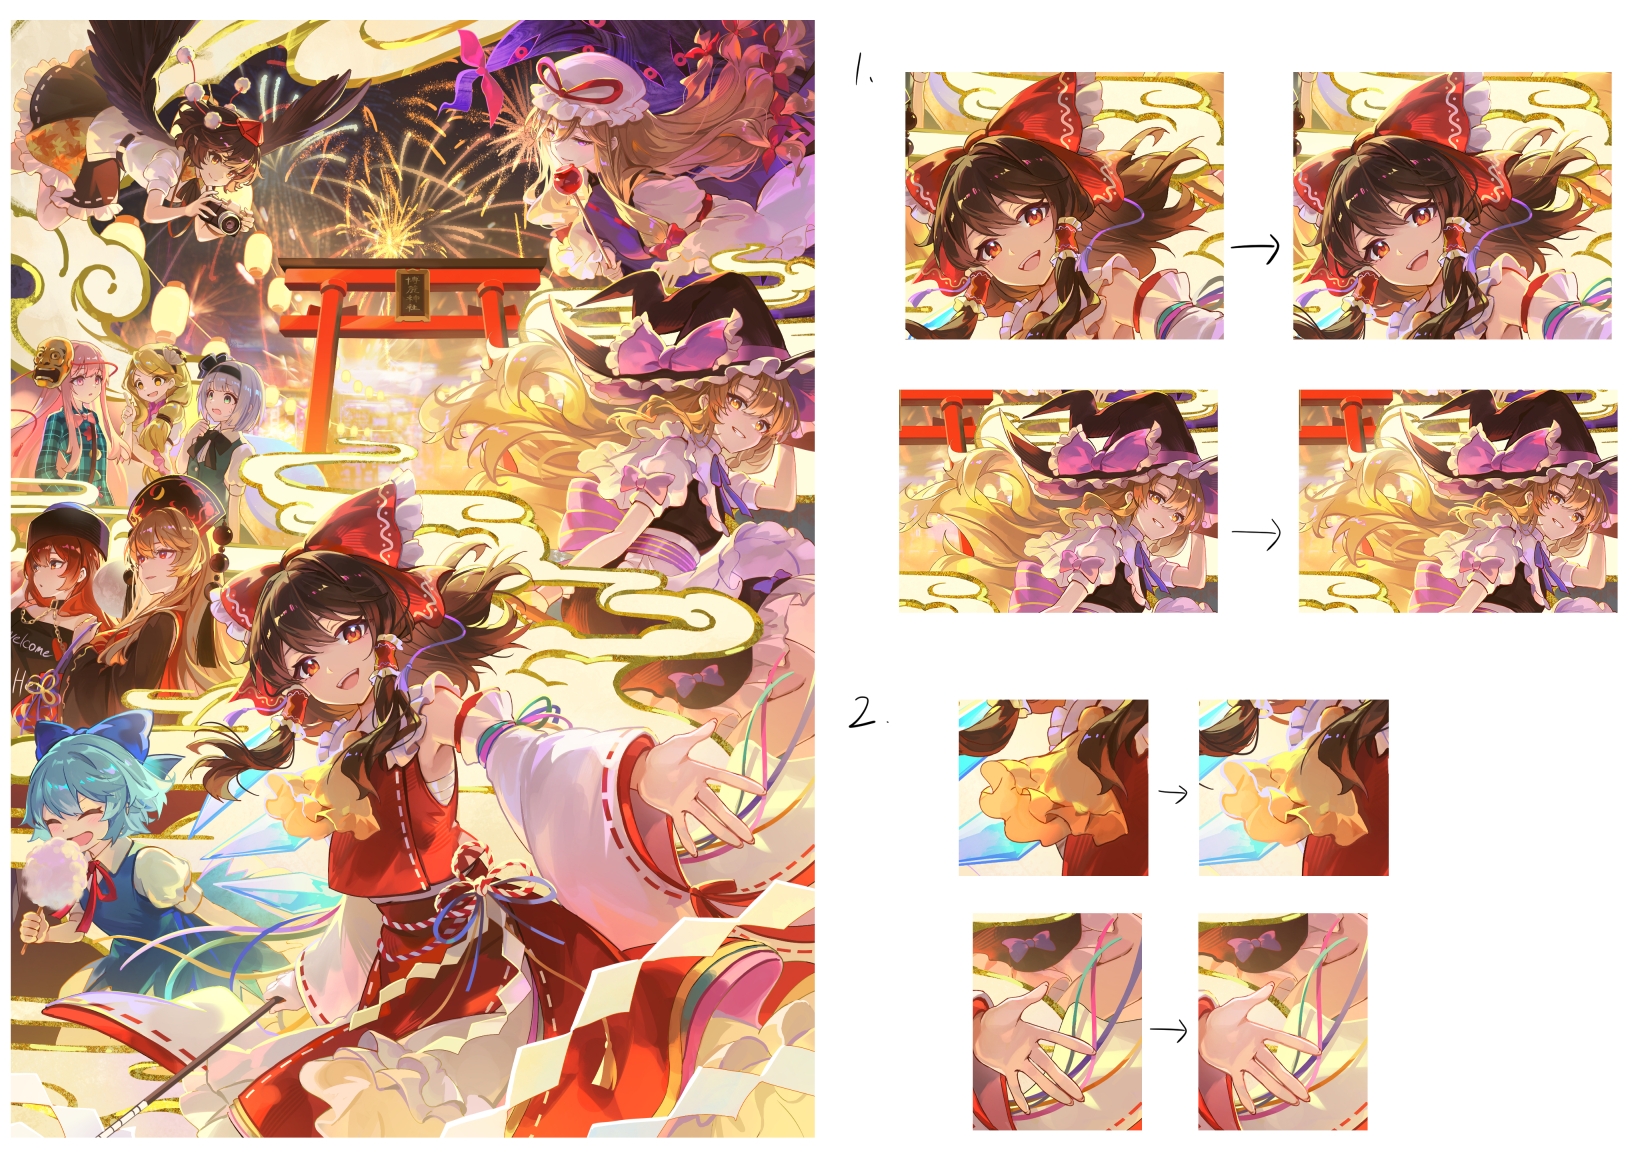
step2の段階で8~9割は完成しているため、ちょっとした加筆作業になります。
1,髪の毛のふんわり感や動きを出すため、細かい毛束を追加しました。
2,明部は線画を塗りつぶすように加筆して、光の明るさを強調しています。
Since the piece is about 80–90% finished at step 2, this is just a small touch-up stage.
1, I added small hair strands to give the hair more softness and movement.
2, In the lit areas, I painted over the lineart to emphasize the brightness of the light.
レイヤー構成の説明や各ステップで行っている詳細についてはこちらをご参照ください。
Please refer to this article for explanations of the layer structure and details of each step.
4,仕上げ finishing
https://downloads.fanbox.cc/images/post/11730785/UmFpR0wZIcsMvRP104pbsn9p.png
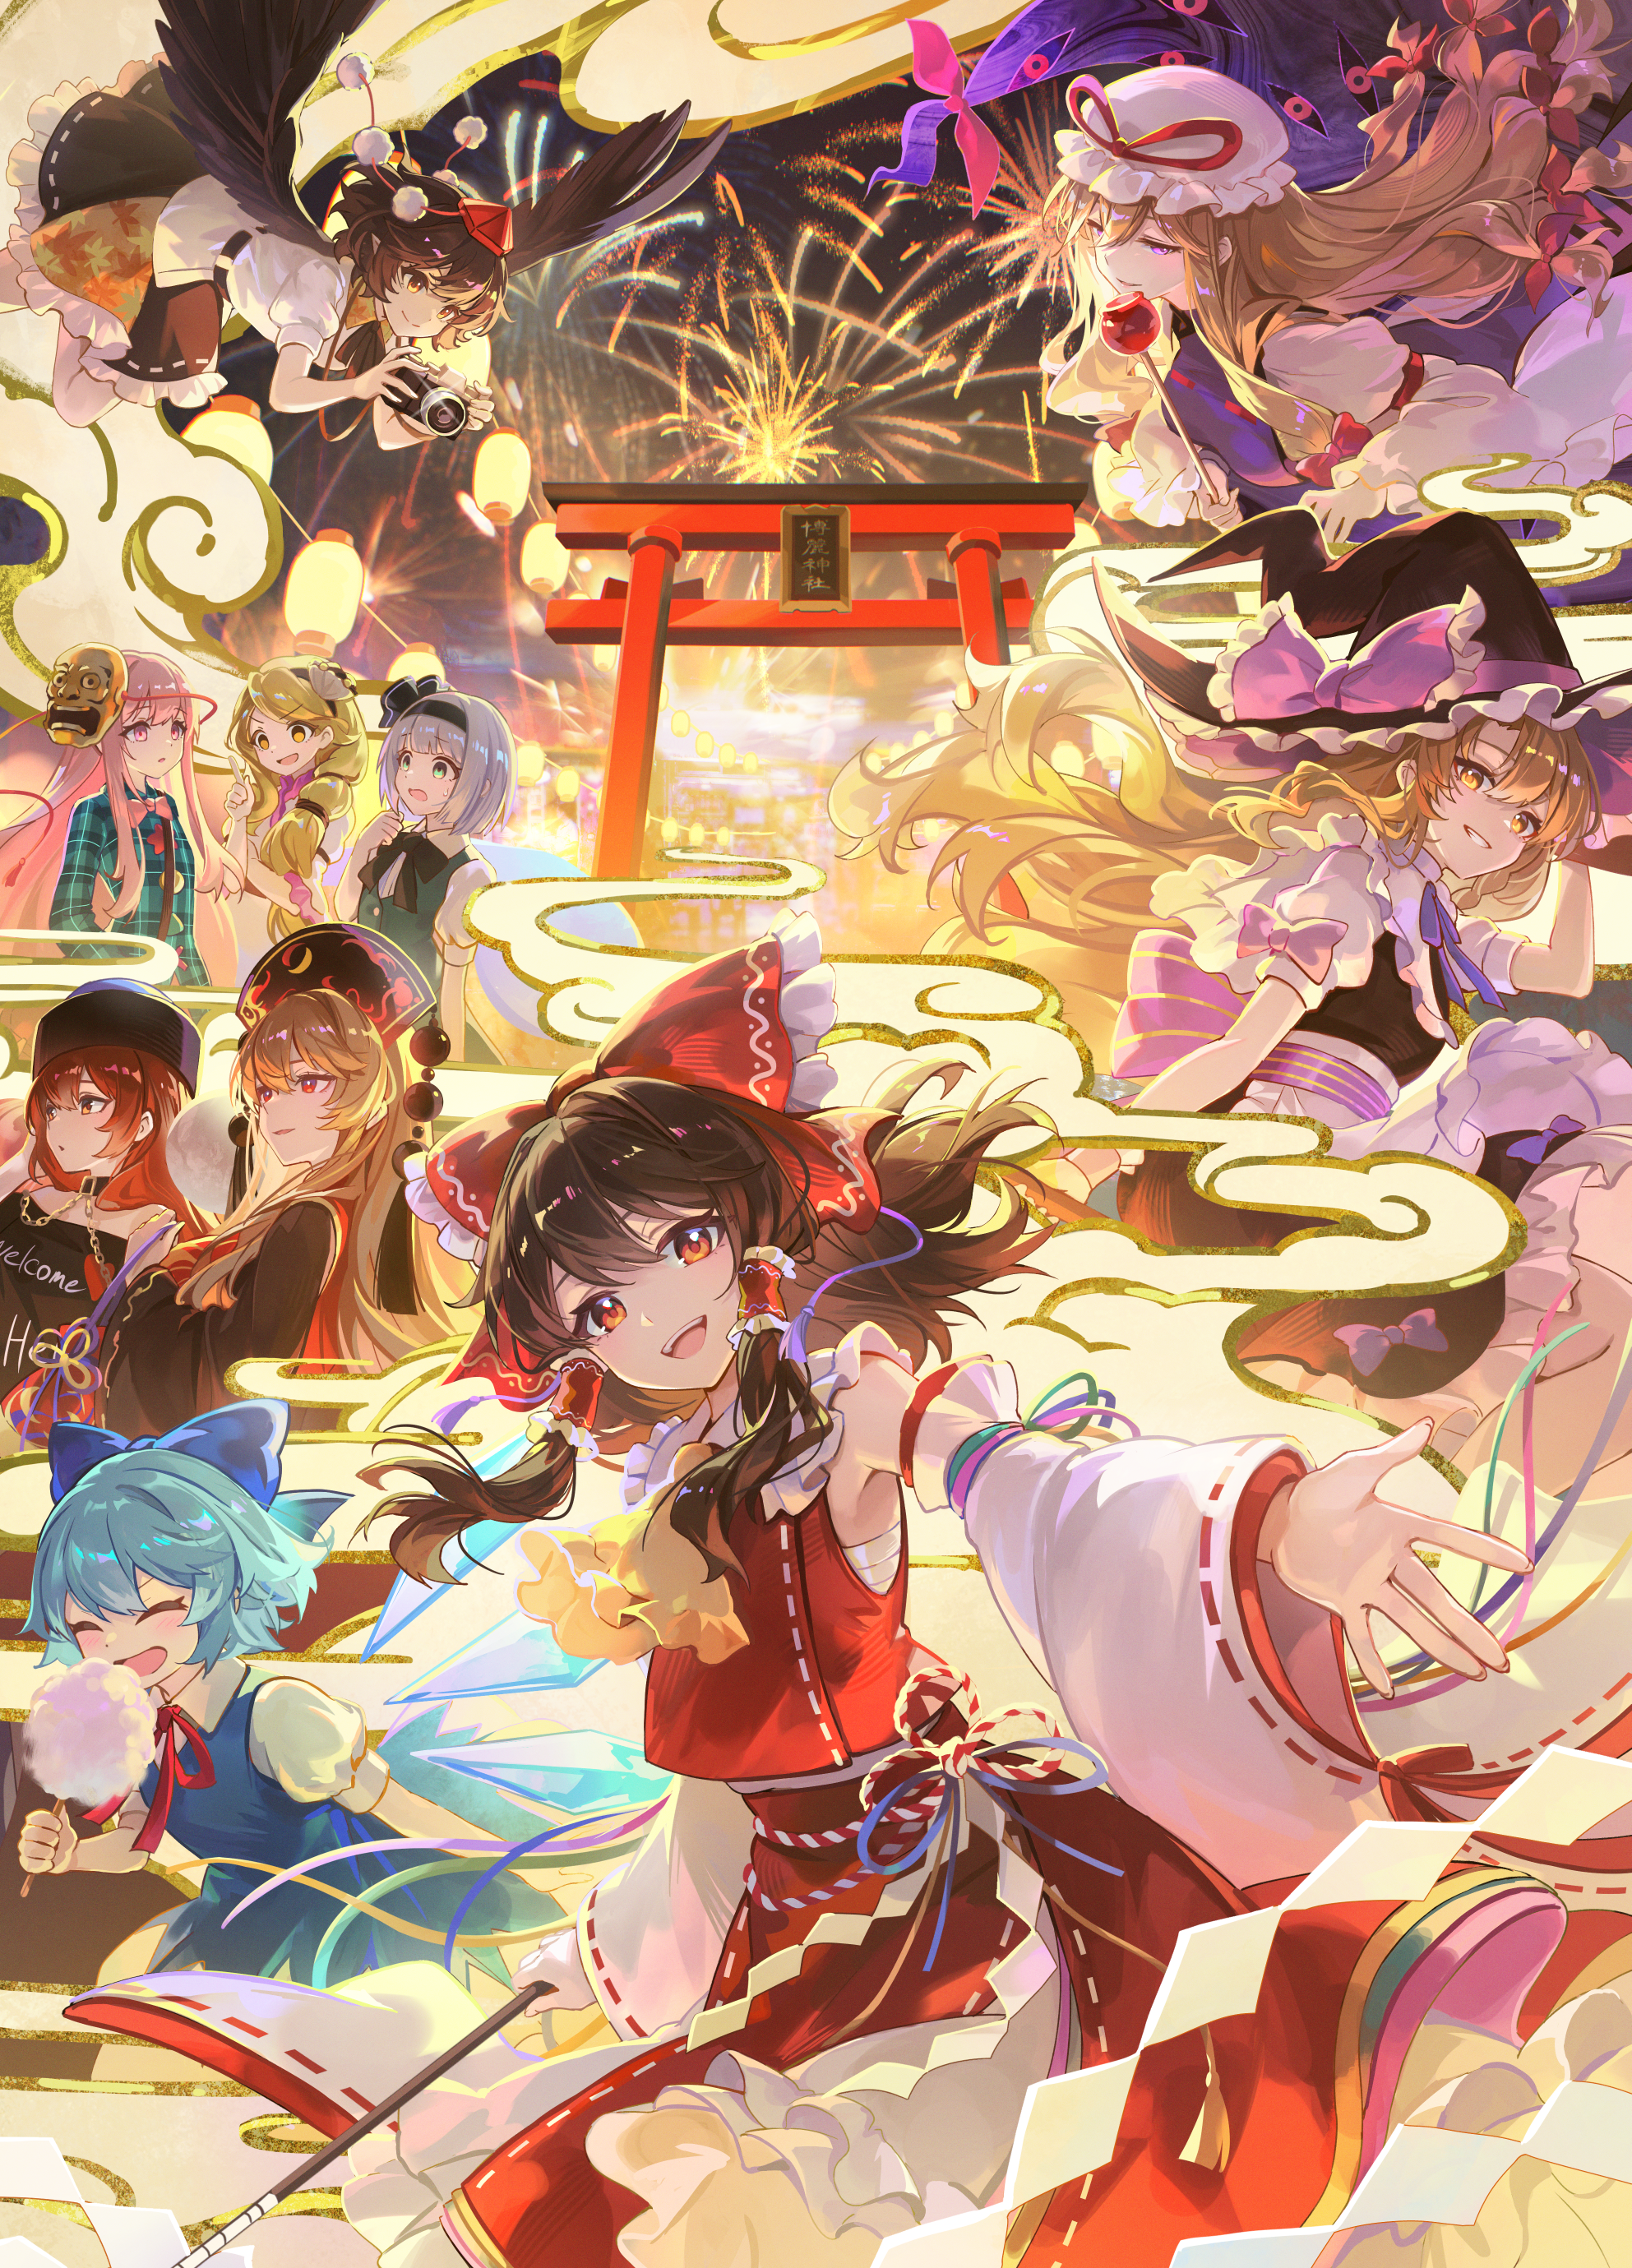
背景に色収差、全体にパーリンノイズを入れて完成です。
I added chromatic aberration to the background and applied Perlin noise to the whole image to finish it.
Leave a comment